Free Propagation Station Shopping List
Get our complete shopping list and setup guide for three different budget levels, plus bonus DIY tutorials.
Download Shopping GuideA well-organized propagation station isn't just functional – it's the heart of your plant parent journey. Whether you have $20 or $200 to spend, you can create a setup that's both beautiful and highly effective. Here's how to build yours.
Why Your Propagation Station Setup Matters
Your propagation station isn't just where you stick cuttings in water. It's your plant nursery, your daily dose of hope, and often the most photographed corner of your home. A thoughtful setup increases your success rate, keeps you organized, and makes the entire propagation process more enjoyable.
🎯 Essential Elements of Any Great Propagation Station:
- • Bright, indirect light (avoid direct sun that can cook cuttings)
- • Easy water access for regular changes
- • Stable surface that won't tip over containers
- • Good drainage to protect surfaces from water damage
- • Organization system to track different cuttings
- • Visual appeal because you'll be looking at it daily!
Three Budget-Friendly Setups
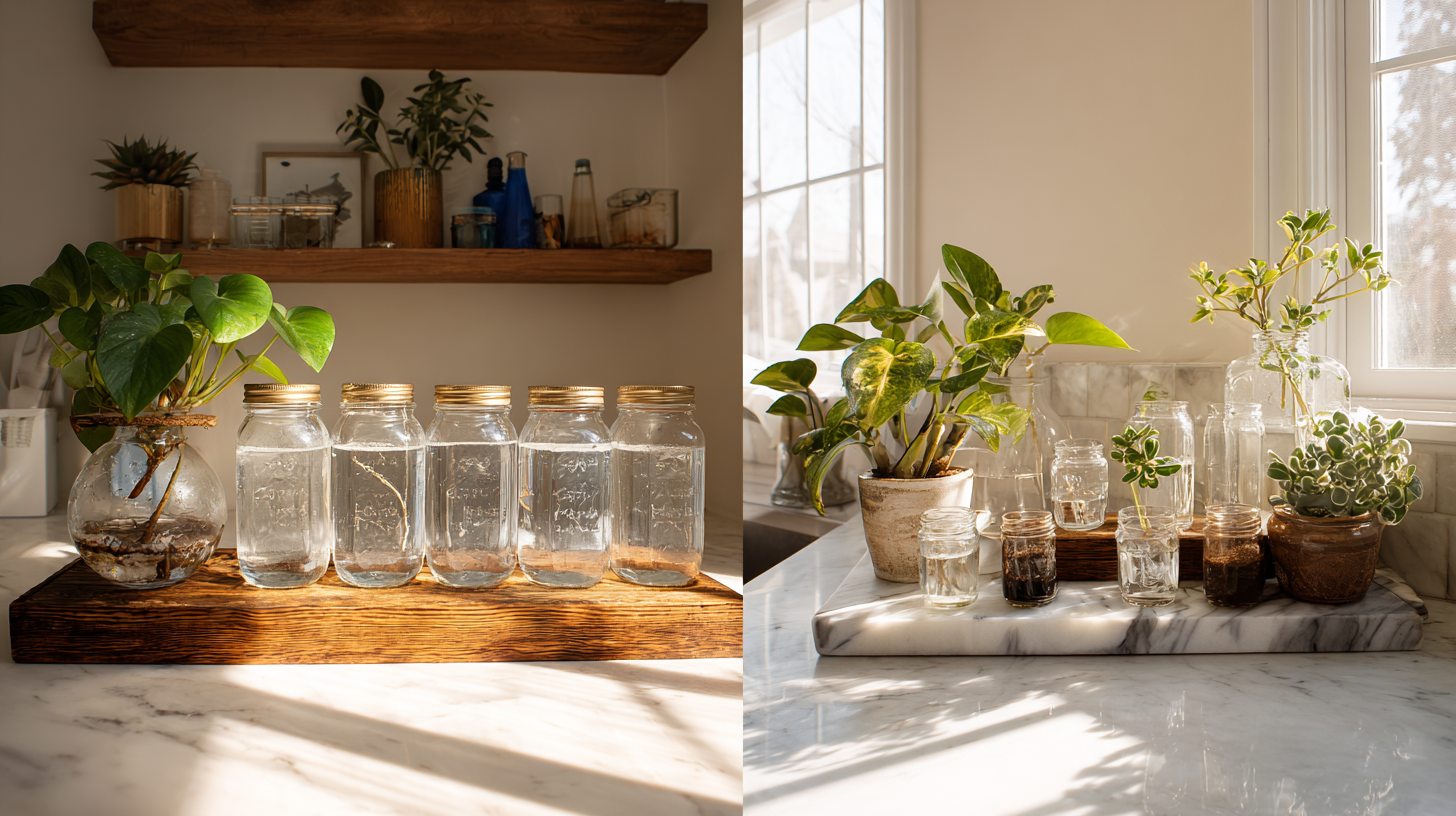
💚 Budget Setup: Under $25
Perfect for beginners or anyone who loves a good DIY challenge!
Shopping List:
- • Mason jars (4-pack) - $8
- • Small wooden cutting board - $6
- • Waterproof tray/dish - $4
- • Plant labels/masking tape - $3
- • Small scissors - $4
Total: ~$25
DIY Upgrades:
- • Wrap jars with twine for rustic look
- • Create plant markers from popsicle sticks
- • Use old books to create height variation
- • Repurpose glass jars from kitchen
Pro Budget Tip: Check thrift stores for unique glass containers and vintage trays. You can often find beautiful pieces for under $2 each!
💙 Mid-Range Setup: $50-75
The sweet spot of functionality and aesthetics!
Shopping List:
- • Glass test tube rack set - $25
- • Bamboo plant shelf/ladder - $20
- • Ceramic drip tray - $8
- • Plant care scissors - $12
- • Waterproof plant labels - $6
- • Small watering can - $4
Total: ~$75
Features:
- • Professional look with test tubes
- • Multiple tiers for organization
- • Easy to clean and maintain
- • Instagram-worthy aesthetic
- • Expandable as collection grows
💜 Premium Setup: $100-150
For serious plant parents who want the ultimate propagation experience!
Shopping List:
- • Acrylic propagation station - $45
- • LED grow light strip - $35
- • Marble or wood display tray - $25
- • Glass bubble planters (set) - $20
- • Professional plant shears - $15
- • pH testing kit - $10
Total: ~$150
Premium Features:
- • Controlled lighting for faster growth
- • Easy-clean acrylic design
- • Professional appearance
- • Multiple vessel types for different plants
- • Water quality monitoring
DIY Propagation Station Ideas
🔧 Test Tube Rack Alternative
Drill holes in a piece of reclaimed wood to hold test tubes or small glass bottles.
Cost: Under $10
Time: 2 hours
📚 Vintage Book Display
Stack old books to create tiered platforms for different sized containers.
Cost: Free - $5
Time: 15 minutes
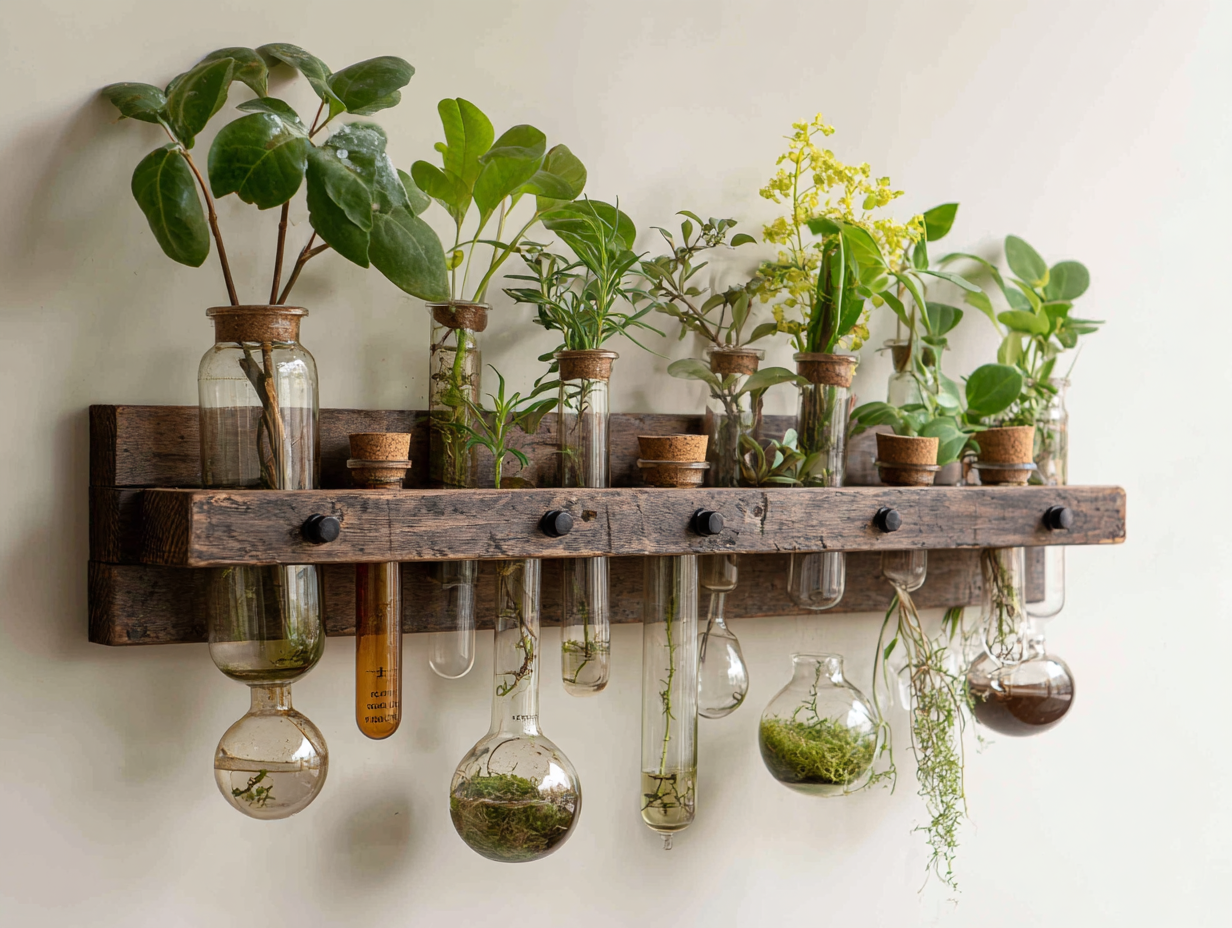
🧪 Hanging Test Tube Garden
Create a wall-mounted display using test tubes and a wooden backing board.
Cost: $15-20
Time: 1 hour
🏺 Vintage Bottle Collection
Use mismatched vintage bottles and jars for an eclectic, bohemian look.
Cost: $10-15
Time: Shopping trip + setup
Location and Lighting Considerations
☀️ Finding the Perfect Spot:
Ideal Locations:
- • North or east-facing windows
- • 3-5 feet from south/west windows
- • Kitchen counters with good light
- • Floating shelves in bright rooms
- • Plant stands near windows
Avoid These Spots:
- • Direct afternoon sun (too intense)
- • Dark corners (insufficient light)
- • Near heating/cooling vents
- • High-traffic areas (risk of bumping)
- • Extremely humid areas (bathroom)
Organization and Labeling System
A good labeling system is crucial for tracking your propagation success. Here are several approaches that work well:
Simple Tape Labels
Use masking tape with plant name and date. Cheap, flexible, and easy to update.
Waterproof Plant Tags
More durable option that looks professional. Great for long-term propagation projects.
Color-Coded System
Use different colored containers or labels for different plant families or propagation dates.
Digital Tracking
Take photos and use a plant app or simple notes app to track progress over time.
Maintenance and Care Tips
🧹 Weekly Maintenance Routine:
Water Change (Every 3-5 days)
Replace all water with fresh, room-temperature water. Clean containers if they look cloudy.
Progress Check
Examine each cutting for new root growth, leaf changes, or signs of rot.
Clean and Organize
Wipe down surfaces, update labels, and rearrange for optimal light exposure.
Document Progress
Take photos and notes about what's working well and what needs adjustment.
Troubleshooting Common Setup Issues
Problem: Containers keep tipping over
Solution: Use a deeper tray with raised edges, or add weight to the bottom of tall containers with glass marbles.
Problem: Water gets moldy quickly
Solution: Improve air circulation, change water more frequently, or add a tiny amount of hydrogen peroxide to the water.
Problem: Cuttings aren't getting enough light
Solution: Add a small LED grow light, move closer to windows, or use reflective surfaces to bounce more light onto plants.
Expandability and Future Growth
Start simple and expand your setup as your propagation skills and plant collection grow. The best propagation stations are modular – you can add new elements without starting over completely.
🌱 Expansion Ideas:
- • Add a humidity dome for finicky tropical plants
- • Install under-cabinet LED strips for consistent lighting
- • Create a separate soil propagation area
- • Add a misting system for humidity-loving plants
- • Build a dedicated photography setup for progress tracking
Remember, the perfect propagation station is the one you'll actually use consistently. Whether it's a simple mason jar on a windowsill or an elaborate multi-tiered system, what matters most is that it fits your space, budget, and lifestyle.
Share Your Propagation Station!
Join our community to share photos of your setup, get inspiration from other plant parents, and connect with people who share your passion for plant propagation.
Join Our Plant Community